
Table of contents
Generate summary with AI

Managing a network of laptops and desktops comes with its own set of IT issues. Some devices may have the right security settings in place, while others are missing key protections like Credential Guard or are running outdated firmware updates that prevent those protections from working correctly. These inconsistencies create security gaps, slow down day to day management, and make it harder to keep systems consistently secured.
In this guide, we’ll guide you through how to check the status of Credential Guard across your devices, verify essential hardware settings like TPM 2.0 and UEFI, and make sure your systems are consistently configured to avoid any errors.
Credential Guard requirements and dependencies
Credential Guard uses virtualization-based security (VBS) to isolate secrets so that only privileged system software can access them. This protection is vital for stopping lateral movement attacks that target login data stored in system memory.
For the service to function reliably, the underlying hardware must support specific security features; if these are missing, Credential Guard will fail to start even if your policies show it as enabled. The essential prerequisites include:
- 64-bit CPU architecture: The system must run on a 64-bit processor with virtualization extensions like Intel VT-x or AMD-V.
- SLAT support: Second Level Address Translation is required to manage memory efficiently between the hardware and the hypervisor.
- UEFI and Secure Boot: The firmware must be UEFI-based with Secure Boot active to ensure the boot process remains untampered.
- TPM 2.0: A Trusted Platform Module version 2.0 provides a hardware-backed root of trust for the virtualization layer.
- Hyper-V and VBS: Windows must be able to run Hyper-V to enable Virtualization-based Security and isolate the Local Security Authority.
» Learn more about disabling and enabling Secure Boot
Default enabling on modern Windows systems
Microsoft has shifted toward a “secure by default” stance with newer versions of Windows. However, whether the feature is active out of the box depends heavily on the hardware source and the Windows edition.
- Secured-core PCs: Credential Guard is typically enabled by default on enterprise laptops from OEMs like Dell or HP that meet Secured-core standards.
- Windows 11 Enterprise: Modern enterprise installations on compatible hardware often have this feature pre-activated to align with security baselines.
- Standard pro editions: Clean installs on standard Windows Pro hardware usually leave the feature disabled by default even if the hardware is capable.
In addition, corporate provisioning tools like Microsoft Intune or Autopilot can enable Credential Guard automatically during setup, ensuring it’s active from the start on managed devices.
» Don’t miss the best options for hardware monitoring software
Security benefits of Credential Guard
The primary goal of Credential Guard is to prevent attackers from extracting reusable credentials from memory. While this offers high-level protection, it can occasionally interfere with older software or specific workflows.
- Blocks credential theft: It effectively stops Pass-the-Hash and Pass-the-Ticket attacks. By isolating Kerberos and NTLM secrets, it ensures that even if an attacker steals a memory dump, they won’t find the usable hashes needed to impersonate users.
- Hardware-rooted OS isolation: It moves sensitive data into a virtualized “container” that is completely separate from the main Windows kernel. Even if an attacker gains full administrative or SYSTEM-level rights, they are physically blocked from reaching the isolated memory.
- Mitigates lateral movement: By protecting high-privilege credentials on workstations and jump servers, it prevents a single compromised machine from becoming a gateway to the entire domain controller.
What to do before verifying that Credential Guard is enabled or disabled in Windows
Before checking the Credential Guard status, you need to validate the system context first. Configuration flags alone can be misleading; for example, a Group Policy might be set to “Enabled,” but if the underlying platform can’t enforce it at runtime, your system remains unprotected.
You must ensure that the hardware and firmware are properly aligned to support the isolation layer.
Follow these steps:
1. Check firmware mode: Press Windows key + R and paste msinfo32 and press Enter

2. In System Information, look for BIOS Mode
- If it says UEFI: You’re good
- If it says Legacy: Credential Guard won’t work unless the system is converted

3. Still in the same window (System Information): Look for: Secure Boot State
- If it says On: You’re good
- If it says Off: It needs to be enabled in BIOS
- If it says Unsupported: The laptop doesn’t support it

4. Check virtualization support: Press Ctrl + Shift + Esc to open Task Manager
5. Go to the Performance tab and click CPU

6. At the bottom look for Virtualization
- If it says Enabled: You’re good
- If it says Disabled: You’ll need to turn it on in BIOS

» Learn more about virtualization by enabling CPU virtualization in BIOS
How to acsess BIOS/UEFI to enable required features
If your system isn’t meeting the prerequisites, you’ll need to adjust BIOS/UEFI settings to enable UEFI mode, Secure Boot, or virtualization.
WARNING: Changing BIOS/UEFI settings can affect how your computer starts and runs. Incorrect changes may prevent Windows from booting, disable hardware features, or cause system instability. Only adjust the settings described here.
Access BIOS/UEFI
- Shut down your PC completely
- Turn it on, and immediately start pressing the BIOS key repeatedly. Common keys:
- F2 (Dell, ASUS, Acer)
- Del (most custom PCs)
- Esc (HP)
- F10 (some HP and Lenovo)
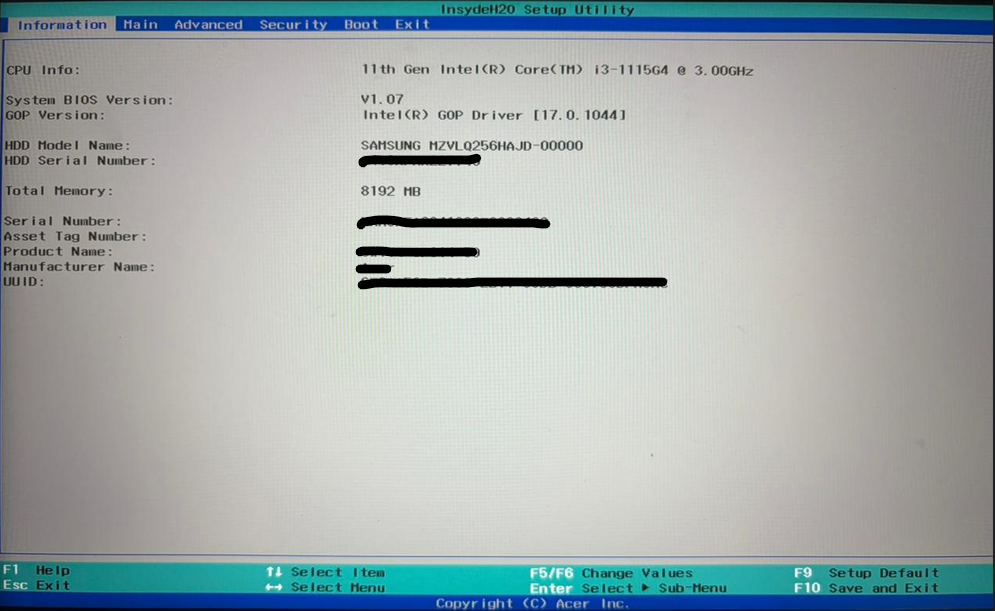
If you pressed the correct key at the right time, the BIOS screen will appear. It’s usually black or dark gray, with menus for Boot, Security, Virtualization, etc. Below is an example of how the screen might look
Take note: If Windows starts loading instead, restart and try again, pressing the key earlier.
» Struggling? Start by identifying your motherboard make & model
Enable Secure Boot
1. Look for a tab or menu called Security, Boot, or Authentication (depends on manufacturer) and find Secure Boot
- If it says Enabled/On: No changes are needed
- If it says Disabled/Off: Select it and change it to Enabled

2. Save changes (usually F10) and exit
Enable virtualization
1. Look for a menu called Advanced, CPU Configuration, or System Configuration
2. Find Intel VT-x, Intel Virtualization Technology, or AMD-V (name depends on CPU)
- If it says Enabled/On: No changes are needed
- If it says Disabled/Off: Select it and change it to Enabled

3. Save changes and exit
» Find out how to update BIOS on your PC
How to verify Credential Guard runtime status
Once the prerequisites are met, the following methods help confirm whether Credential Guard is actively running on the system, not just configured through policy or settings.
Method 1: System Information
This method is for local administrators or users who need a quick, visual confirmation of whether protection is actively running on a single machine. It’s best used for a fast check when you are sitting at the device.
Follow these steps:
1. Press Windows + R on your keyboard, typemsinfo32, and hit Enter
2. The System Summary will open. Scroll down to the bottom of the right-hand pane. and look for the row labeled Virtualization-based security. It must say “Running”

Take note: If VBS is running and Credential Guard appears under Security Services Running, the protection is live. Microsoft confirms that these msinfo32 fields reflect runtime enforcement, not just configuration.
Method 2: PowerShell
PowerShell is for IT professionals and system admins who need to audit multiple machines or want a definitive answer from the system kernel. It’s more reliable than GUI tools because it queries the runtime status directly.
Follow these steps:
1. Search PowerShell in your search bar and click “Run as administrator”

2. Paste the following command and press Enter:(Get-CimInstance -ClassName Win32_DeviceGuard -Namespace root\Microsoft\Windows\DeviceGuard).SecurityServicesRunning

Interpret the result:
- If the output includes 1, Credential Guard is actively running
- If the output is 0 or empty, Credential Guard is disabled or failing to start
3. To see the full configuration and runtime details, run:Get-CimInstance -ClassName Win32_DeviceGuard -Namespace root\Microsoft\Windows\DeviceGuard
This shows all Device Guard and Credential Guard properties for the system.

Did you know? For IT teams managing multiple endpoints, running PowerShell on each device manually can be time-consuming and inefficient. Atera’s RMM platform lets you run PowerShell scripts remotely across all systems from a single console. Results are collected centrally, giving you a clear view of which devices have protections active and which need attention, so you can ensure every system is properly secured.
» Did you know you can paste in PowerShell ?
Method 3: Group Policy
Group Policy is the best way to determine the intended configuration for domain-joined systems. It allows administrators to see if Credential Guard is enforced by corporate policy, though it doesn’t always guarantee the hardware is actually running it.
Follow these steps:
- Press Windows + R, type gpedit.msc (for local) or
gpmc.mscfor domain), and hit Enter - Navigate to: Computer Configuration > Administrative Templates > System > Device Guard
- Double-click the policy named Turn On Virtualization Based Security
- Check the status: If Enabled, look at the Credential Guard Configuration dropdown:
- Enabled with UEFI lock: This means the feature is enforced and cannot be disabled remotely by an attacker
- Enabled without lock: The feature is active but can be turned off via remote management tools
- To see which policies are reaching a specific computer, run
gpresult /h gpresult.htmlin an admin command prompt and open the resulting file
» Here’s everything you need to know about group policy management with Atera
Method 4: Event Viewer
Event Viewer is for deep troubleshooting. It shows you the exact moment Credential Guard tried to start during the boot process and tells you specifically why it failed if it didn’t initialize correctly.
Follow these steps:
1. Search Event Viewer in your search bar and click to open it

2. Navigate through the folders: Applications and Services Logs > Microsoft > Windows

3. Look for DeviceGuard > Operational

4. Analyze the Event IDs:
- Event ID 101: VBS started successfully. This is a good sign that the environment for Credential Guard is ready
- Event ID 102 or 103: VBS failed to start. The event details will usually list the culprit, such as “Secure Boot is not enabled” or “TPM not found“
- WinInit Event ID 13: Look in the System log for this ID, which explicitly confirms that Credential Guard (Lsalso.exe) is successfully enabled

» Need help? Here’s our guide to viewing and analyzing logs with Event Viewer
Managing Credential Guard with Atera
Atera’s RMM platform makes it easier to see where Credential Guard is enabled and where it isn’t, all from one central dashboard. Instead of checking devices one by one, you get a clear view of the entire environment and can spot gaps quickly.
With Atera’s AI Copilot, you can create and deploy simple scripts to confirm whether the right security settings are in place. This tool helps keep configurations consistent across devices, reduces the risk of identity-based attacks, and makes day-to-day management more straightforward.
» Want to try it out? Try Atera for free
Frequently Asked Questions
Related Articles

How to check if a disk is MBR or GPT in Windows
Choosing between MBR and GPT depends on your hardware and future storage needs, with GPT supporting larger drives and modern security features. You can check your disk’s partition style in seconds using Disk Management, Command Prompt, or PowerShell.
Read now
How to enable or disable the Action Center in Windows 10 and 11
The Action Center centralizes system alerts and quick toggles, but it requires specific background services and shell integrations to function correctly. While hiding the interface stops visual distractions, notifications still process in the background, making proactive management necessary for security.
Read now
How to change file associations in Windows 10 and 11
Windows file associations follow a priority system that decides which app opens your files, and problems usually happen when those links break or apps aren’t registered correctly. You can fix or change them using built-in tools, while automation platforms make large-scale management much easier.
Read now
How to fix the “vcruntime140.dll not found” error in Windows 11
The "vcruntime140.dll" error usually happens because of missing or corrupt Visual C++ Redistributables. To fix it safely, verify your system architecture and reinstall the official Microsoft packages for both x86 and x64.
Read nowEndless IT possibilities
Boost your productivity with Atera’s intuitive, centralized all-in-one platform


