
Generate summary with AI

You boot up a Windows 11 machine, and instead of the usual RGB light show, you get hit with “Driver cannot load on this device” for ene.sys, a driver commonly used by ASUS Aura, MSI Mystic Light, and other RGB utilities. So the RGB controller sits there without being able to do anything.
The ene.sys driver load failure stems from a combination of Windows 11’s hardened security architecture, driver compatibility issues, and conflicts between RGB lighting ecosystems. Understanding these root causes helps you diagnose the problem quickly and choose the right fix.
Thankfully there are a few easy fixes you can follow to resolve the issue and get those controllers up and running again. Here’s everything you need to know about why Windows 11 blocks ene.sys more aggressively than Windows 10, how to diagnose the root cause, and some proven methods to fix it.
Common technical conditions triggering ene.sys load failure
There are 4 main issues that might cause ene.sys to fail:
1. Driver-signing issues occur when ene.sys lacks proper digital signatures, causing Windows to block it under kernel-mode code integrity policies.
2. Security-policy conflicts happen when Core Isolation and Memory Integrity (HVCI) flag ene.sys as vulnerable. Microsoft’s Vulnerable Driver Blocklist has included RGB-related drivers since 2022, specifically targeting known vulnerable kernel drivers.
3. OEM RGB controller inconsistencies emerge when manufacturers like ASUS Aura, MSI Mystic Light, and Gigabyte RGB Fusion ship outdated ene.sys builds with their utilities.
4. Windows Update mismatches occur after cumulative updates when ene.sys fails due to mismatched kernel APIs.
» Here’s how to disable Windows updates and manually re-enable Windows updates
The most frequent blockers are HVCI (Hypervisor-Protected Code Integrity), Smart App Control, and Kernel-Mode Code Integrity. These layers enforce Microsoft’s Vulnerable Driver Blocklist, which explicitly includes ene.sys.
IT teams face critical trade-offs when addressing these blocks:
- Disabling HVCI restores RGB functionality but reduces protection against kernel exploits
- Smart App Control ensures app trust but may block legitimate OEM utilities
- Balancing security vs. usability often means creating controlled exceptions in enterprise IT environments rather than wholesale security feature disablement
Why this error occurs more frequently in Windows 11
Windows 11 enforces Kernel Mode Driver Signing, Memory Integrity, and Smart App Control far more aggressively than Windows 10, which blocks unsigned or legacy drivers like ene.sys by default. These security features technically exist in Windows 10 but are typically disabled by default. Users must manually enable Memory Integrity, giving older unsigned drivers a pass. Windows 11 enables these protections during installation on supported hardware.
On Server editions, RGB drivers like ene.sys are rarely used, and security policies offer more customization options for administrators who need to run specific unsigned drivers.
» Make sure you understand the hidden costs of legacy IT
Easiest methods to fix the ene.sys driver failing to load
Before attempting any fixes, you should run through this systematic diagnostic workflow to identify the root cause:
1. Event log verification: Check Event Viewer > System for kernel-mode driver block events. Microsoft notes 70% of driver block incidents are logged under Event ID 7000 (service start failure).
2. Driver-signature checks: Use sigverif.exe or PowerShell’s <Get-AuthenticodeSignature “C:\Program Files (x86)\ENE\ene.sys”> cmdlet to confirm whether ene.sys has valid digital signing. The output will show the signature status, typically:
- Valid: Driver is properly signed. The issue is likely a policy block.
- NotSigned: Driver lacks a digital signature. This is why Windows blocks it.
- UnknownError: File may be corrupted or the certificate has expired.
3. ENE folder inspection: Navigate to C:\Program Files (x86)\ENE in File Explorer. If this folder doesn’t exist, the RGB utility may not be installed correctly, or the driver files were deleted during a previous uninstall attempt. If the folder exists, check for these IT issues:
- Missing ene.sys file: The driver file should be present. If it’s missing, you’ll need to reinstall your RGB utility.
- Multiple versions of ene.sys: Look for files like ene.sys, ene.sys.bak, or ene_old.sys. This indicates incomplete updates or failed installations.
- Unusually small file sizes: Right-click ene.sys > Properties. If the file shows 0 KB or significantly smaller than expected (typically 20-50 KB), it’s likely corrupted.
- Recent modification dates: Compare the file’s “Date modified” against when you last updated your RGB software. Mismatched dates suggest Windows Update or another process modified the driver unexpectedly
Now you can move onto the actual fixing methods:
1. Reinstall or update your RGB utility
The most common fix involves completely uninstalling your current RGB software, cleaning up residual files, and installing the latest version from the manufacturer.
Step 1: Verify the current signature status
1. Open PowerShell as an administrator

2. Run this command: Get-AuthenticodeSignature “C:\Program Files (x86)\ENE\ene.sys”

Check the status field for these values:
- Valid: Driver is signed but blocked by policy, go to method 2.
- NotSigned: Driver is unsigned, proceed with this method.
- UnknownError: File may be corrupted, proceed with this method.
Step 2: Uninstall the current RGB utility
Open Settings > Apps > Installed apps (or Control Panel > Programs and Features on older Windows versions). Locate and uninstall:
- ASUS Aura Sync
- MSI Mystic Light
- ASRock Polychrome RGB
- Gigabyte RGB Fusion
- Any other RGB control software

Step 2: Delete ENE residual files
After uninstallation, manually remove leftover files:
1. Navigate to C:\Program Files (x86)\ENE and delete the entire folder

2. Press Win + R, type regedit, and press Enter

3. Navigate to HKEY_LOCAL_MACHINE\SYSTEM\CurrentControlSet\Services\ene.sys
4. Right-click the ene.sys key and select Delete
5. Search for any other “ENE” or “ene.sys” entries under Services and remove them
WARNING: Making incorrect edits to the registry could potentially break your system and render it unusable. Make sure you know what you’re doing and don’t accidentally delete the wrong information.
Step 3: Download the latest RGB utility
Visit your hardware manufacturer’s official website:
- ASUS: ASUS Support Downloads
- MSI: MSI Download Center
- ASRock: ASRock Support Page
- Gigabyte: Gigabyte Support Downloads
Download the newest version available for your specific motherboard or device model and install it.
Step 4: Verify the fix
After reboot:
1. Open Device Manager (right-click Start > Device Manager)
2. Expand “System devices” or “Human Interface Devices”
3. Look for your RGB controller. It should appear without a yellow exclamation mark
4. Launch your RGB utility to confirm lighting control works
If the issue persists, proceed to Method 2.
» Don’t miss our review of the top 10 driver updater software
2. Adjust Windows 11 security features
If reinstalling the RGB utility doesn’t work, Windows 11’s security features may be blocking the driver.
WARNING: Although this method might work, it requires careful consideration of security trade-offs. Disabling these features reduces protection against kernel-level exploits, so you should only disable security features if you trust the source of your RGB software, you’re on a personal workstation instead of a corporate device, and you understand the increased security risk.
If you aren’t comfortable with this, move on to method 3.
For Windows 11 Home and Pro users
Step 1: Disable Memory Integrity
1. Open Windows Security (search for it in Start menu)

2. Click Device Security
3. Under Core Isolation, click “Core isolation details”

4. Toggle off Memory integrity

5. Restart your computer
Step 2: Check Smart App Control (Pro only)
Smart App Control center is not available on home edition.
1. Open Settings > Privacy & security > Windows Security
2. Click App & browser control

3. Under Smart App Control, select “Off” or “Evaluation mode”

If you’re on a managed device, you may need administrator rights or IT support to make these changes:
1. Follow the same steps as Home/Pro for Memory Integrity
2. If changes are greyed out, your organization controls these settings via Group Policy
3. Contact your IT administrator to request an exception for ene.sys
4. Provide them with your device details and the specific driver file path
» Here’s what you need to know about group policy management with Atera
3. Resolve conflicts between multiple RGB suites
If you have multiple RGB utilities installed (Corsair iCUE, Razer Synapse, ASUS Aura, MSI Mystic Light), they compete for control of ene.sys. The easiest way to fix this is just to remove the ones you don’t need and keep the one you do.
Step 1: Identify all active RGB software
1. Press Ctrl + Shift + Esc to open Task Manager
2. Go to the Startup tab

3. Note all RGB-related applications including:
- Corsair iCUE
- Razer Synapse
- ASUS Aura Service / LightingService
- MSI Mystic Light Service / CorsairLLAService
- Gigabyte RGB Fusion
- ASRock Polychrome RGB
- SignalRGB
4. Determine which utility to keep, which should match your motherboard manufacturer (or peripheral manufacturer’s software if you have peripheral-only RGB)
» Learn more about managing Windows startup programs
Step 2: Uninstall conflicting utilities
For each RGB utility you’re removing:
1. Open Settings > Apps > Installed apps
2. Uninstall the application
3. Navigate to its installation folder (usually C:\Program Files (x86)[Manufacturer]) and delete any remaining files

4. Open Services (press Win + R, type services.msc)

5. Look for related services like “LightingService” or “CorsairService”
6. Right-click each service, select Properties, set Startup type to “Disabled”, and stop the service

Step 3: Clean registry conflicts
1. Press Win + R, type regedit, and press Enter
2. Navigate to HKEY_LOCAL_MACHINE\SYSTEM\CurrentControlSet\Services
3. Look for keys related to uninstalled RGB software (ENE, LightingService, CorsairLLA, etc.)
4. Right-click and delete these keys
5. Search for additional references by pressing Ctrl + F and searching for “ene.sys” or the manufacturer name
4. Remediate GPO, Intune, or EDR blocks (for IT administrators)
Enterprise environments often block unsigned drivers through Group Policy Objects (GPO), Microsoft Intune policies, or Endpoint Detection and Response (EDR) solutions.
You can remove these blocks by following these steps:
Step 1: Identify the block source
Determine which system is blocking ene.sys:
Check Event Viewer:
1. Open Event Viewer on the affected machine
2. Navigate to Windows Logs > System
3. Filter for Event IDs 7000, 7026, or 219
4. Look for entries mentioning ene.sys or “driver blocked”
» If you need help with Event Viewer, see our guide to viewing and analyzing logs with Event Viewer
Check Microsoft Defender logs:
1. Open Windows Security > Virus & threat protection
2. Click Protection history

3. Look for “Blocked” or “Quarantined” items related to ene.sys
Check EDR console: If using Defender for Endpoint or third-party EDR (CrowdStrike, SentinelOne):
1. Access your EDR management console
2. Search for the affected device
3. Review security events and driver blocks for ene.sys
Step 2: Whitelist ene.sys in the appropriate system
For Group Policy (domain-joined environments):
1. Open Group Policy Management Console (GPMC) on a domain controller or management workstation
2. Navigate to the OU containing the affected devices
3. Right-click and select “Edit”
4. Navigate to Computer Configuration > Policies > Windows Settings > Security Settings > Application Control Policies > AppLocker or Software Restriction Policies
5. Create an exception rule for C:\Program Files (x86)\ENE\ene.sys
6. Apply the policy and run gpupdate /force on affected machines
For Microsoft Intune (cloud-managed or hybrid-joined):
1. Sign in to Microsoft Intune admin center
2. Go to Endpoint security > Attack surface reduction
3. Create a new ASR policy or edit existing
4. Under Exclusions, add: C:\Program Files (x86)\ENE\ene.sys
5. Assign the policy to the appropriate device groups
6. Devices will receive the updated policy within 8 hours (or force sync immediately)
» Read our Intune review
Step 3: Deploy the policy change
Step 4: Reboot and validate
After deploying the policy:
1. Restart affected devices
2. Check Event Viewer for Event ID 7000/7026; entries should no longer appear
3. Verify in Device Manager that the RGB controller loads without errors
4. Launch the RGB utility to confirm functionality
5. Monitor for 24-48 hours to ensure the issue doesn’t recur
5. Perform clean driver removal and reinstallation with PowerShell
For IT administrators managing multiple endpoints or users comfortable with command-line tools, PowerShell provides the most thorough driver cleanup. The real benefit of PowerShell is that you can add conditional logic and deploy PowerShells scripts remotely to multiple endpoints with enterprise RMM tools.
Here’s what that workflow might look like:
Step 1: Stop RGB services
Open PowerShell as Administrator and paste this script:
The Script:
Atera does not guarantee the integrity, availability, security, virus-free, safety, lawfulness, non-infringement, rights’ status, or functionality of the scripts. The use of the shared scripts is at your own risk. Scripts are provided “AS IS”. *
Stop-Service -Name "LightingService" -Force -ErrorAction SilentlyContinue
Stop-Service -Name "MSI_LED_Service" -Force -ErrorAction SilentlyContinue
Get-Service | Where-Object {$_.Name -like "*Lightning*" -or $_.Name -like "*MSI*" -or $_.Name -like "*RGB*"}
Note: Don’t worry about the green # lines in the screenshot above, they’re just comments explaining what the line does!
» Here’s how to kill a process in Windows
Step 2: Identify and remove the driver
1. List all third party drivers to find ene.sys with this script: pnputil /enum-drivers

2. Scroll through the output and note the OEM number for ene.sys (e.g., oem42.inf). Then remove it with this script: pnputil /delete-driver oemXX.inf /uninstall /force
Make sure you replace “oemXX.inf” with your actual OEM number”

3. If you’re unsure which OEM number corresponds to ene.sys, you can search more specifically with this script: pnputil /enum-drivers | Select-String -Pattern “ene” -Context 3,3
Step 3: Delete residual files
Remove leftover installation files with this script:
The Script:
Atera does not guarantee the integrity, availability, security, virus-free, safety, lawfulness, non-infringement, rights’ status, or functionality of the scripts. The use of the shared scripts is at your own risk. Scripts are provided “AS IS”. *
Remove-Item "C:\Program Files (x86)\ENE" -Recurse -Force -ErrorAction SilentlyContinue
Remove-Item "C:\Program Files\ENE" -Recurse -Force -ErrorAction SilentlyContinue
Step 4: Clean registry entries
Remove ene.sys service entries with this script:
The Script:
Atera does not guarantee the integrity, availability, security, virus-free, safety, lawfulness, non-infringement, rights’ status, or functionality of the scripts. The use of the shared scripts is at your own risk. Scripts are provided “AS IS”. *
Remove-Item -Path "HKLM:\SYSTEM\CurrentControlSet\Services\ene.sys" -Force -ErrorAction SilentlyContinue
Remove-Item -Path "HKLM:\SYSTEM\CurrentControlSet\Services\enetechio" -Force -ErrorAction SilentlyContinue

Get-ChildItem "HKLM:\SYSTEM\CurrentControlSet\Services" | Where-Object {$_.Name -like "*ene*" | Remove-Item -Force -ErrorAction SilentlyContinue
Step 5: Deploy updated RGB utility
Now you can proceed with downloading and installing the right utilities on your target machines and rebooting to validate the install.
Streamline driver fixes across your entire fleet
For IT teams managing multiple endpoints, Atera streamlines driver remediation at scale. You can use AI Copilot to generate the PowerShell cleanup script from plain text instructions like “create a script to remove ene.sys driver and clean registry entries, then reboot”, and Copilot produces the executable code without manual scripting.
You can then deploy this script across affected machines through Atera’s RMM platform, targeting specific devices or entire groups with a few clicks. The platform’s real-time monitoring tracks script execution status across your fleet, alerting you to failures or success rates through the centralized dashboard. This eliminates the manual process of connecting to individual machines, running cleanup commands, and verifying results one system at a time.
» Try it yourself with a free trial of Atera
Related Articles
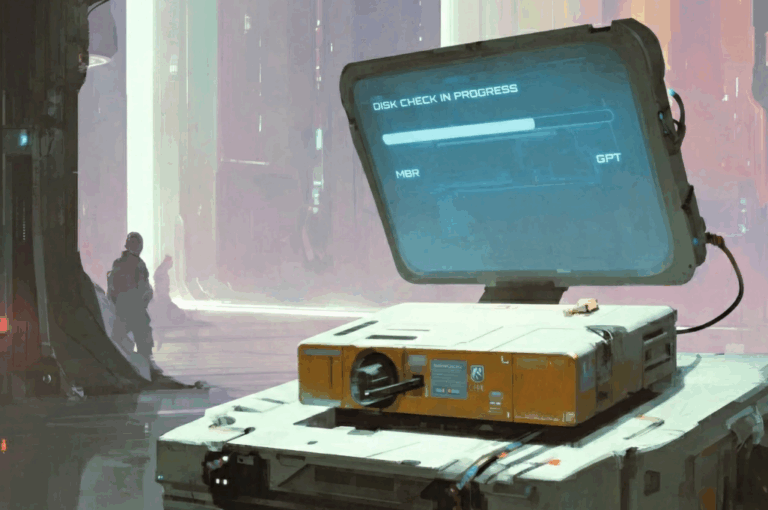
How to check if a disk is MBR or GPT in Windows
Choosing between MBR and GPT depends on your hardware and future storage needs, with GPT supporting larger drives and modern security features. You can check your disk’s partition style in seconds using Disk Management, Command Prompt, or PowerShell.
Read now
How to enable or disable the Action Center in Windows 10 and 11
The Action Center centralizes system alerts and quick toggles, but it requires specific background services and shell integrations to function correctly. While hiding the interface stops visual distractions, notifications still process in the background, making proactive management necessary for security.
Read now
How to change file associations in Windows 10 and 11
Windows file associations follow a priority system that decides which app opens your files, and problems usually happen when those links break or apps aren’t registered correctly. You can fix or change them using built-in tools, while automation platforms make large-scale management much easier.
Read now
How to fix the “vcruntime140.dll not found” error in Windows 11
The "vcruntime140.dll" error usually happens because of missing or corrupt Visual C++ Redistributables. To fix it safely, verify your system architecture and reinstall the official Microsoft packages for both x86 and x64.
Read nowEndless IT possibilities
Boost your productivity with Atera’s intuitive, centralized all-in-one platform


